Tenting
The “Hardware Store Tenting Puck”
When you want to try out the Tenting Puck but don’t live in Europe. I built this out of stuff from Lowes.
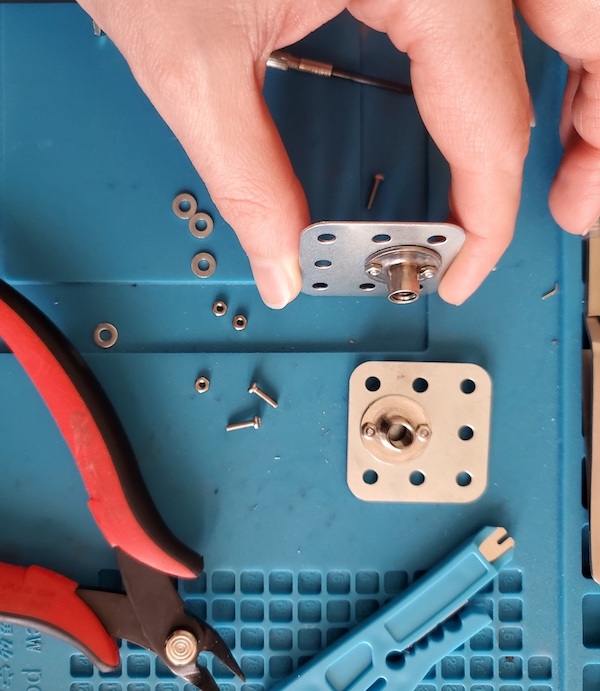
This little hack consists of:
| Part | Quantity | Lowes Link | Price |
| 1.5” square mending plates | 2 | https://www.lowes.com/pd/Hillman-1-1-2-in-x-1-1-2-in-Gauge-Triple-Zinc-Mending-Plates-3-Pack/3478205 | $3.98 for three |
| 1/4-20 tee nuts | 2 | https://www.lowes.com/pd/Hillman-1-4-in-Stainless-Steel-Standard-SAE-Brad-Hole-Tee-Nut/3025380 | $3.23 |
| M2 screws and nuts | 8 to 12 of each | idk, Amazon or Mouser | cheap |
Just screw the nut to the plate and the plate to the keeb.
Et voila!
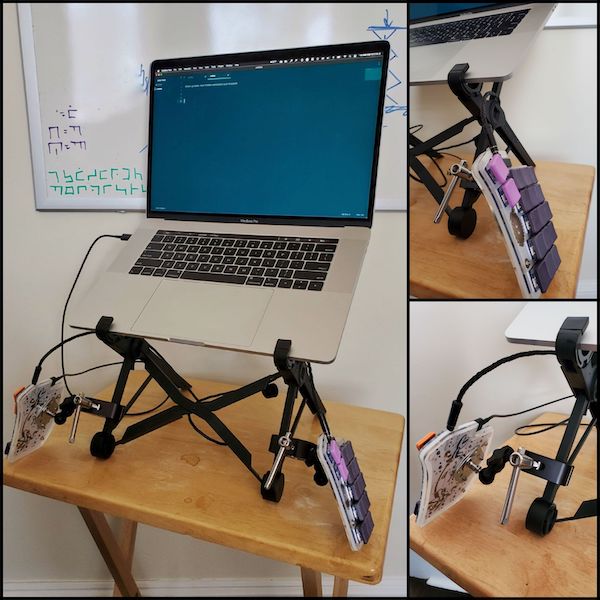
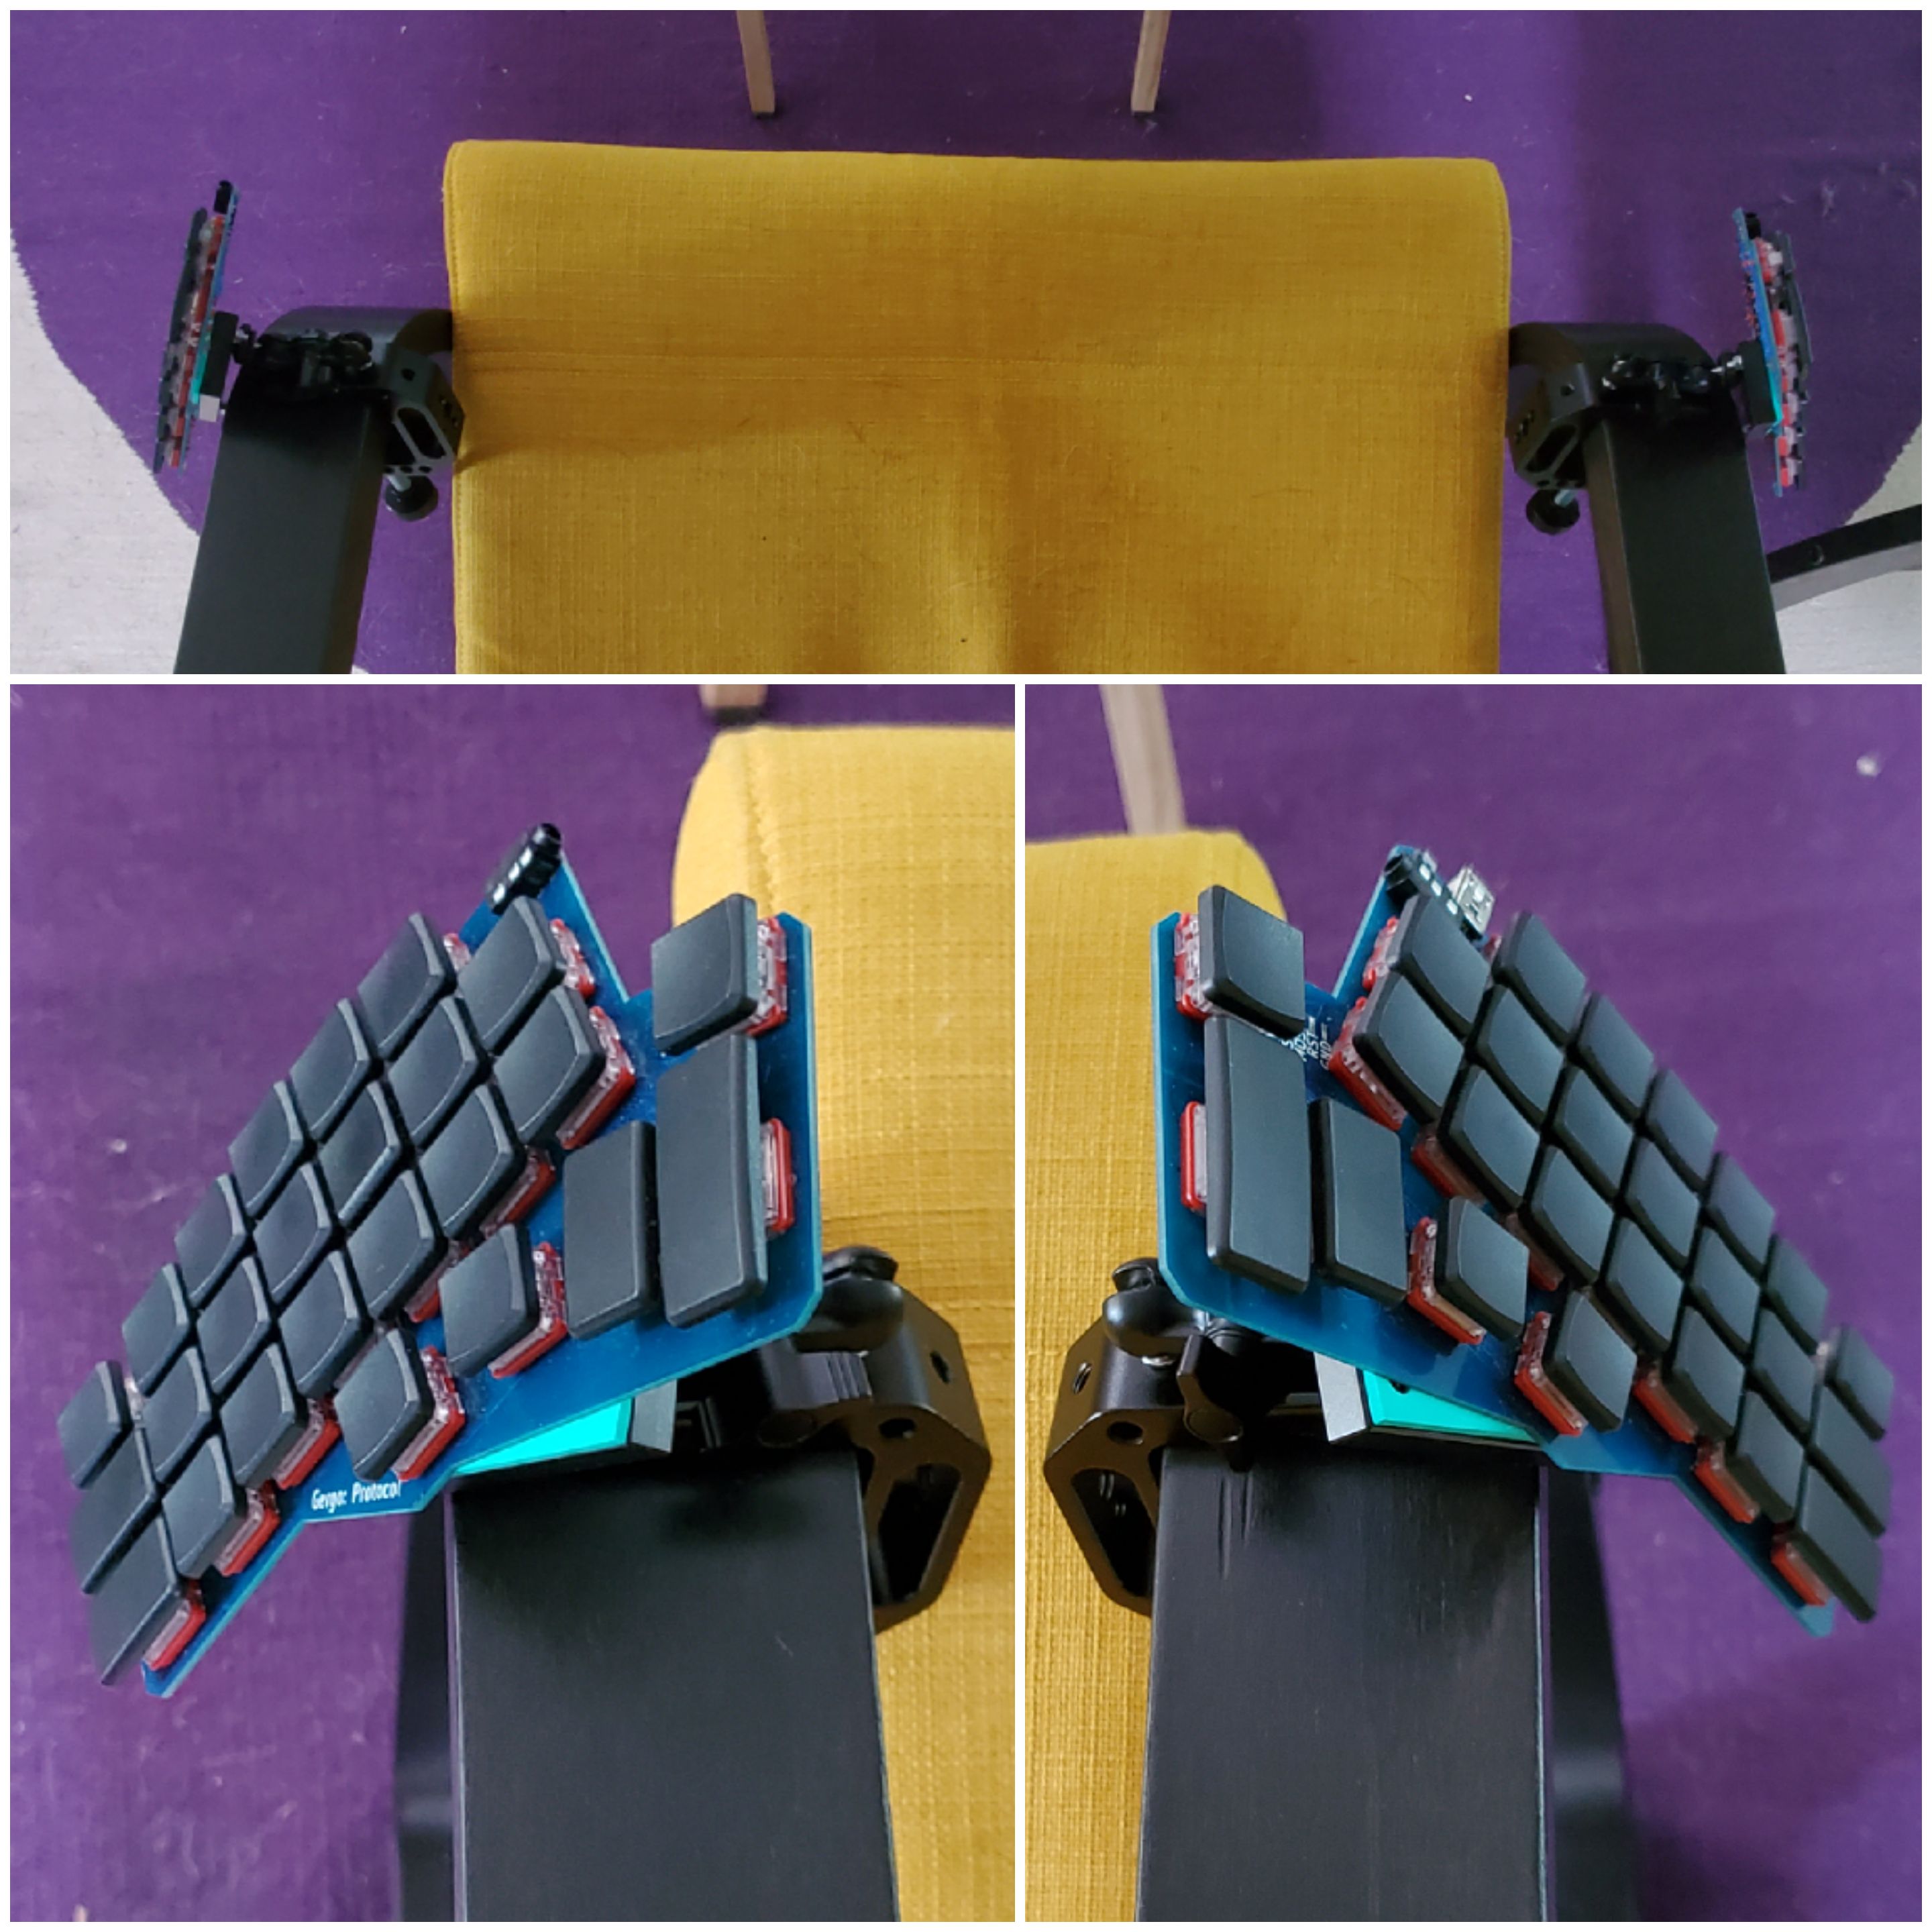
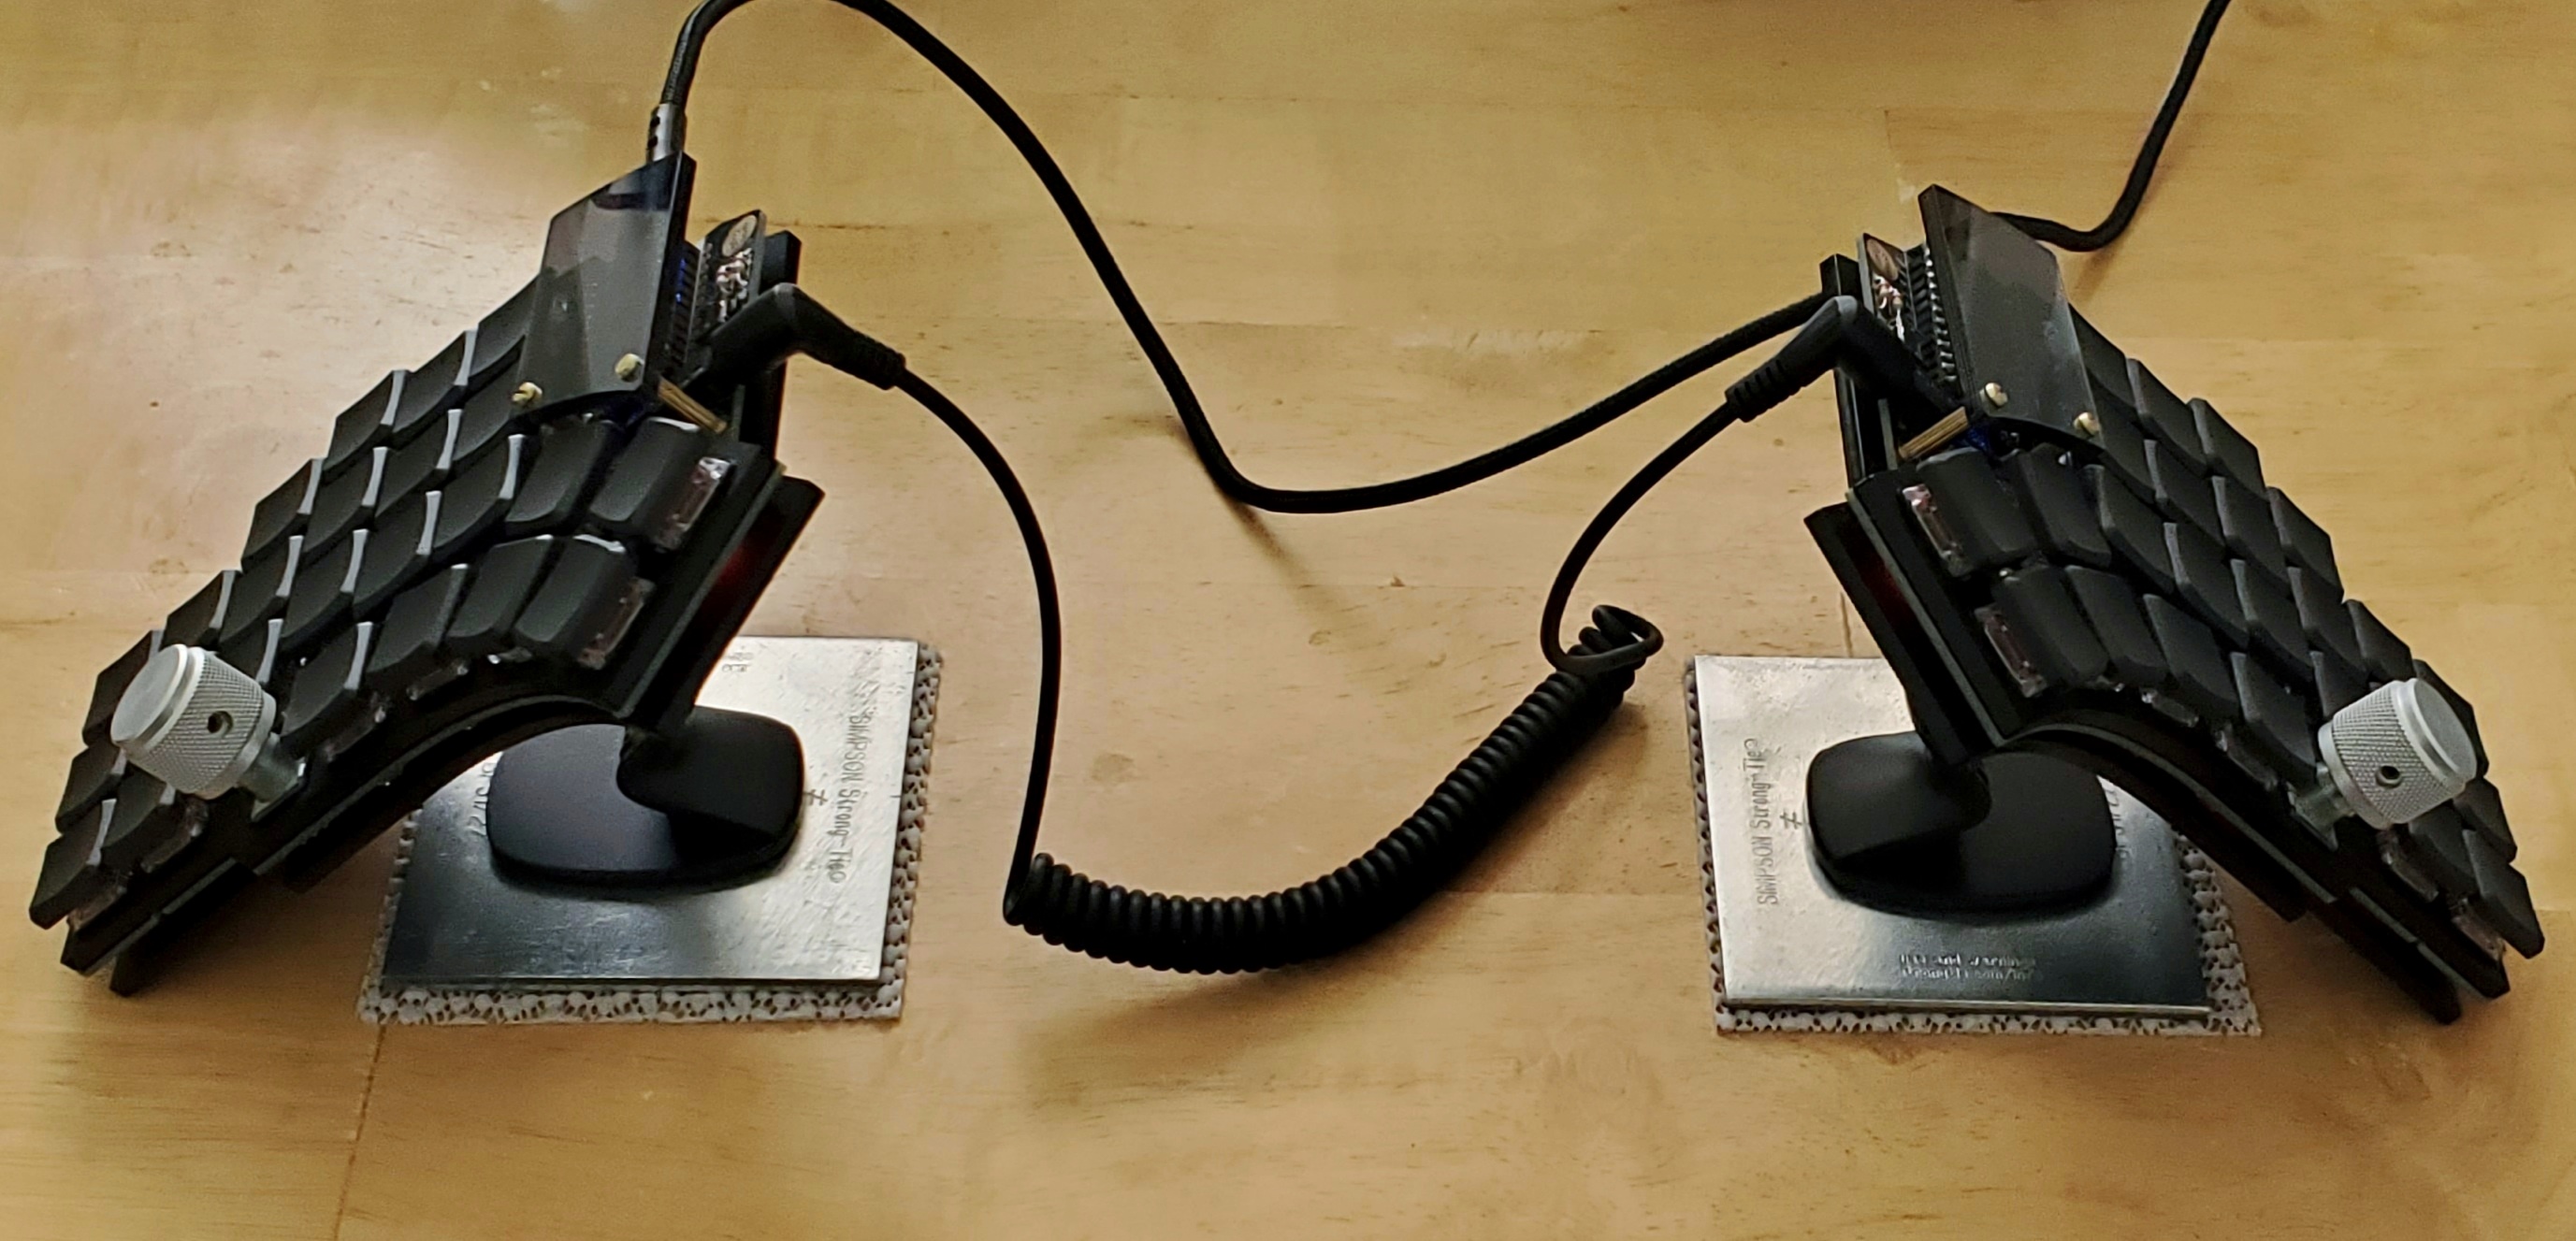
The Ballhead Method (aka “tripod-style”)
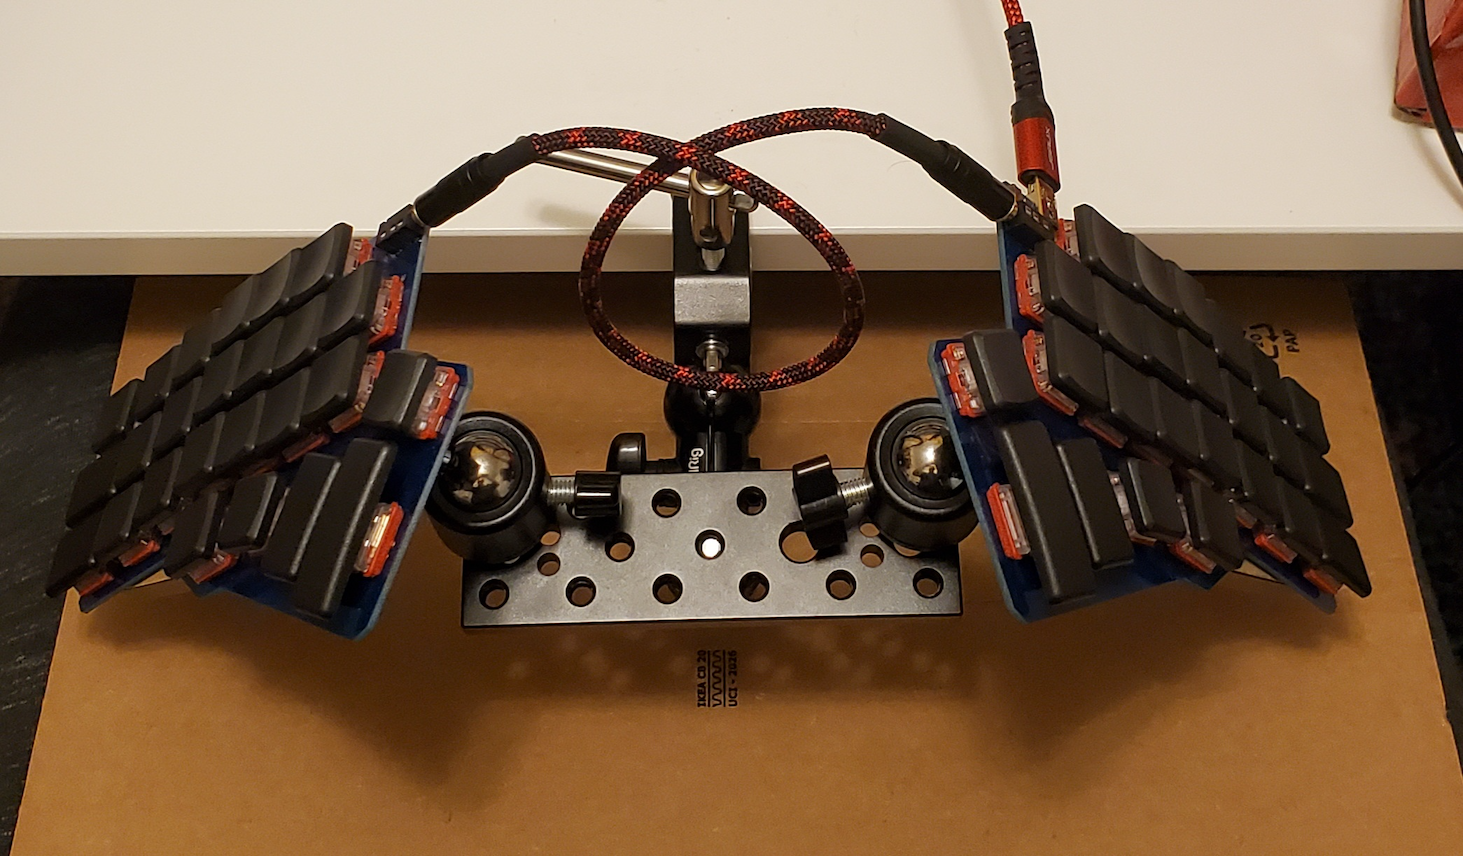
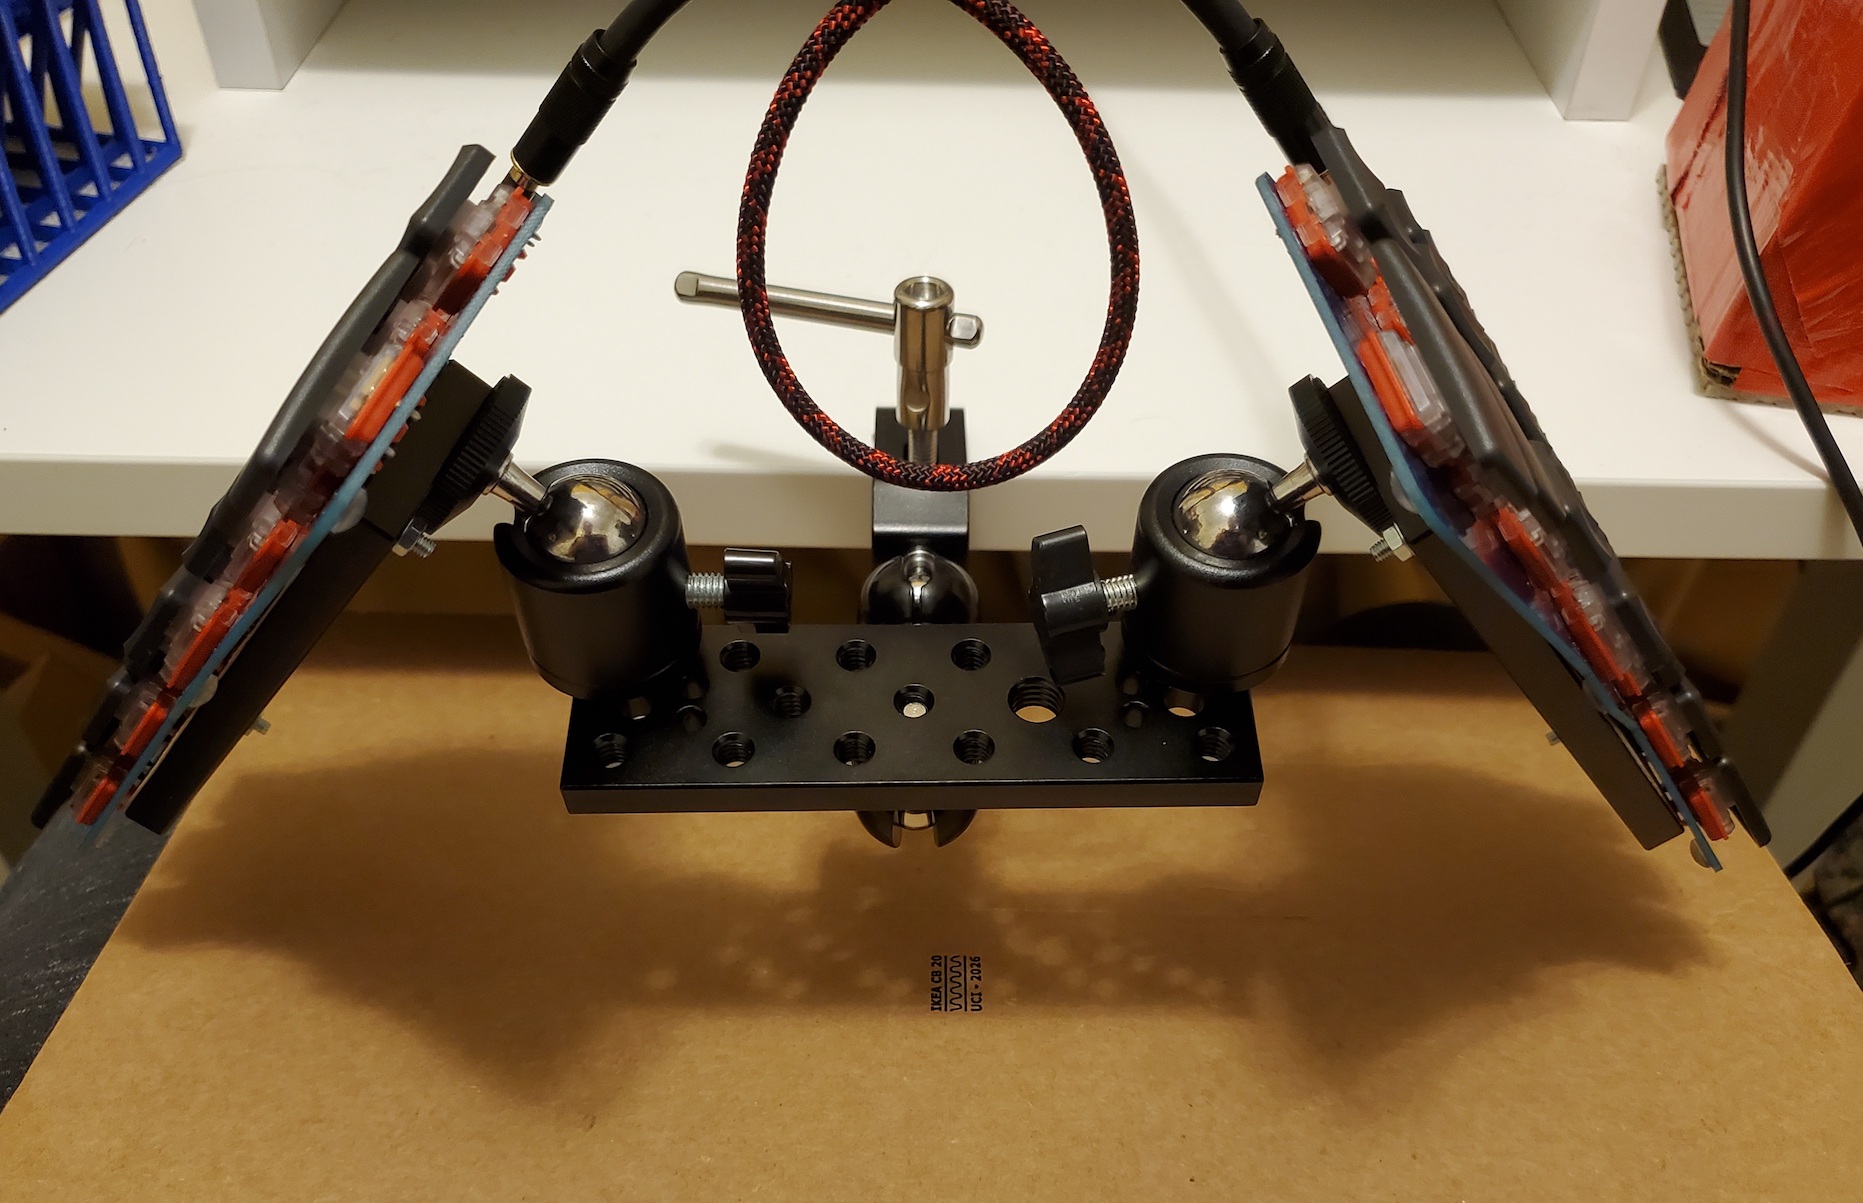
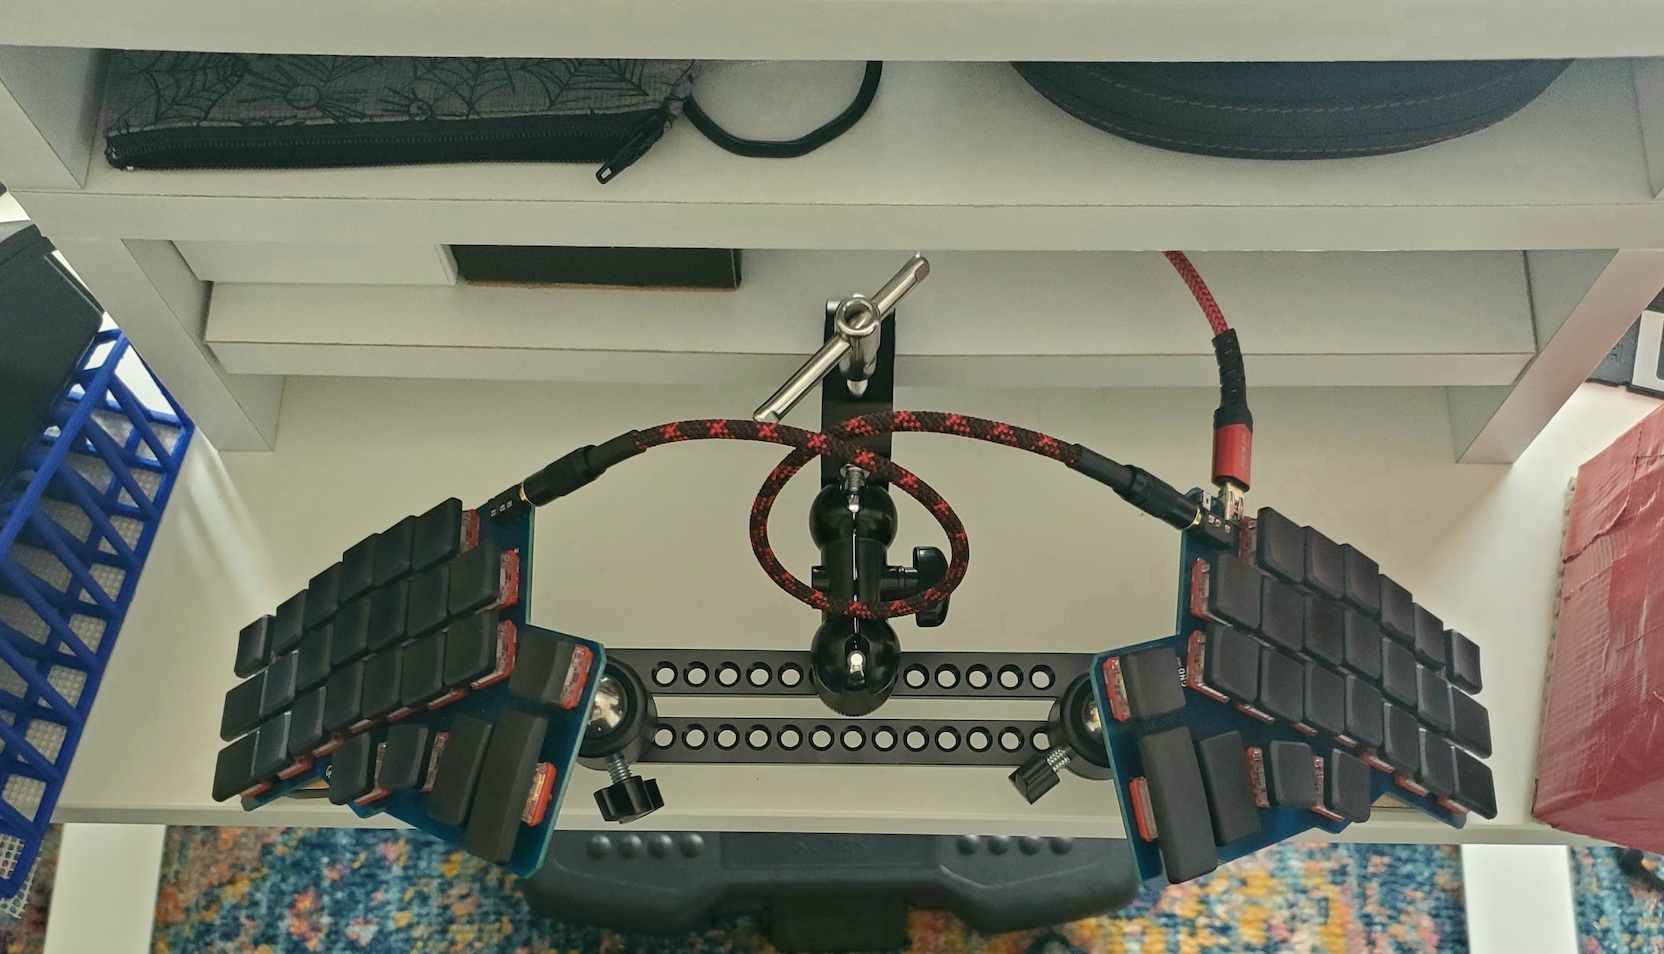
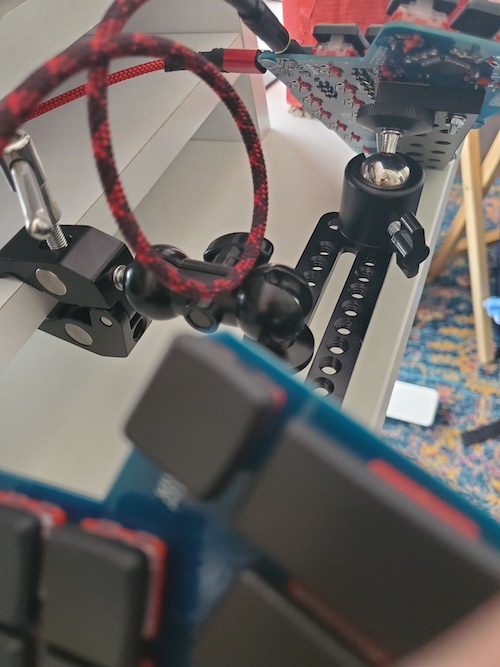
This is the most flexible tenting solution I’ve come across. It’s based on a post and BOM by Martin Körner of StenoBlog.
All you really need is a way to affix your boards to a cheeseplate or any other way of getting your boards affixed to a 1/4”-20 threaded hole and you’re golden. I’ve used it off the front edge of a desk, clamped onto a cheap laptop riser shelf/stack, clamped onto a TV tray… it Just Works.
Here are the particular parts I used:
| Part | Quantity | Amazon Link | Price |
|---|---|---|---|
| SMALLRIG Ballhead Arm Super Clamp Mount Multi-Function Double Ball Adapter with Bottom Clamp | 1 | Link | $15 |
| EXMAX Mini Tripod Ball Head with 1/4” Screw Thread Base (2 Pack) | 1 | Link | $11 |
| CAMVATE Long Cheese Plate 1/4”-20 Mounting Platform | 1 | Link | $12 |
| SMALLRIG Multi-Function Mounting Plate Cheese Plate with 1/4” and 3/8” Connections | 2 | Link | $12.50 |
Assembly is simple:
- Clamp your clamp to your target
- screw the double ballhead on that clamp into the long cheeseplate
- screw the mini tripod ballheads onto either end of that long cheeseplate
- and then attach your keyboard halves to the other two cheeseplates and mount those on the mini tripod ballheads.
I used four sets of M3 machine screws/nuts/washers to affix the Gergo in the above pictures to the small cheeseplates (I put a thin layer of cardboard between the plates and the PCBs to avoid electrical issues). For keyboards like the Moonlander, which has a quartet of screwholes on the bottom in size M2.6, that’s a good option. For any 3D Printed case, you can always embed a 1/4”-20 threaded insert, which lets you avoid buying the small cheeseplates. For keyboards compatible with the splitkb.com tenting puck, that should let you mount to this setup, as well, without the smaller cheeseplates.
Good luck and happy tenting!
Alternate mode: two clamps to clamp to table or chair arms!
Magnetic Phone Stand Tenting
I think it was Obosob who first described this method of tenting to me. I bought some magnetic phone stands off of Amazon based on his suggestions and stuck the steel plates to my Kyria’s caseback et voila!
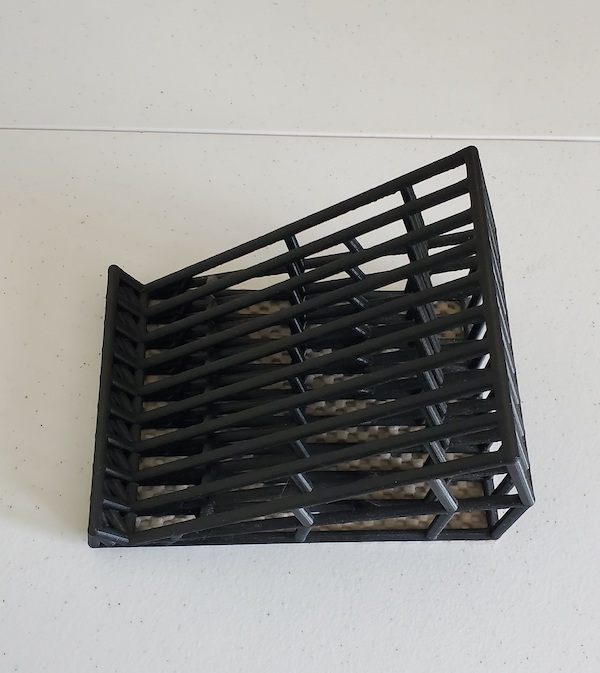
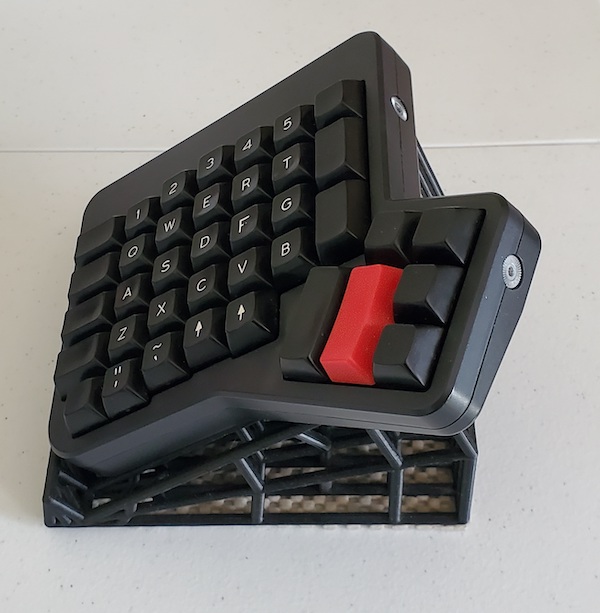
3D Printed Lattice Tent/Tilt Stands
I designed this lattice-based stand for my work Ergodox using a Design-by-Programming software called Mithril, developed by my team at Siemens Technology for DARPA’s TRAnsformative DESign (TRADES) program!