My Keymap
An Abundance of Layers
I’ve often found myself wanting to share and explain the keyboard layout I developed over four years of using an Ergodox EZ as a daily driver at work. However, because I moved from using the Configurator to writing my own keymaps in C years ago, it’s pretty difficult to share the theory and utility of the layout with most people.
I eventually undertook to write up my most up-to-date keymap in KLE (the Keyboard Layout Editor) and to describe it in detail over here. Nowadays I mostly use a Kyria or a Gergo rather than an Ergodox and I have been making changes and updating things. I feel like it’s time for a refreshed writeup with new images showing how this kind of layout works on a smaller board.
This is just what has worked for me and there’s no reason in particular that it should or shouldn’t work for you.
Then again, I’ve written proposals, Powerpoints, LaTeX, C, C++, Python, R, emails, Teams messages, reports, and spreadsheets with this layout and I think it handles all of these use cases well.
If you’d like to follow along in the code as we step through the various layers, you can find the latest version of the keymap here and the users folder containing a lot of the magic pixie dust here.
A note: I’ve been running this on Mac for the past couple years, so there may be some Mac-isms at various places in the map and especially in the code (e.g., in the desktop switcher keys). Also, the keymap-mac.c file is definitely the most up-to-date and is the map I based this document on, as well.
The Base Layer
My base layer remains QWERTY-based, because every time I think of switching alpha layouts, I fall down the “which layout should I choose?” rabbithole until I get tired :-) Of course, the actual organization of the alpha layer isn’t the secret sauce in a QWERTY-based layout and I think most of what I’ve done here would work just as well with Colemak or ASETNIOP or any of the others.
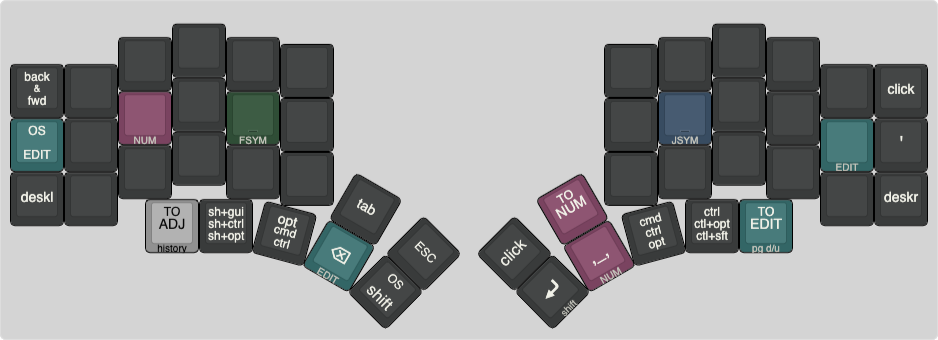
I’ve indicated a few things with colors in this layout. Most notably, keys that trigger any kind of layer transition are colored in a particular color corresponding to the layer the lead to. In several cases, multiple keys can be used to get to a particular layer. TOs take you straight to the new layer, turning off every other layer except the BASE layer. LTs and OSLs turn a new layer on temporarily, either while being held (LT and OSL) or for the next keystroke after it’s pressed and released (OSL). If you get into a layer via an LT, if that same key has a function in the target layer, you won’t be able to use it (so, e.g., I can’t hold down ; to get into EDIT and expect to be able to use the Home key).
I’ve used some of the “standard” qmk shorthand in this writeup, as well, and you see some of that on display in this layer. The Tap Dances on the bottom row are one-shot mod tapdances which are intended to get me easy access to all of the mods with one tap of the correct key, but also to let me access any mod with either hand by tapdancing. So, when the third row of text from the top on the key to the left of my backspace key says “CTL”, that means tapping that key three times will activate one-shot control (and, if you hold it down on the third tap, it acts as control being held down). Similarly, the key to the left of that lets you tapdance your way through one-shot (or hold) S(G) (which is shift+GUI, which on my Mac is shift-command), shift-control, and shift-alt (shift-option). The “Move 1 Desktop” keys move you between adjacent Mac virtual desktops by sending Control-Left or Control-Right.
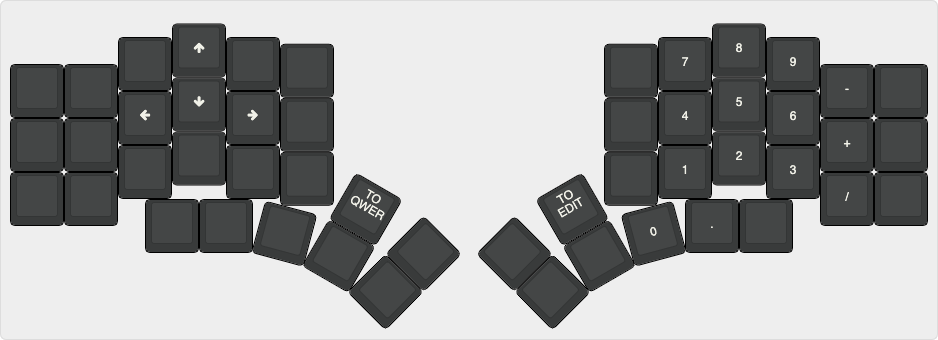
The NUMPAD Layer
This is the next layer in the stack, so it’s the next one I’ll talk about. It’s a quite straightforward layer, overall, though I take advantage of the Ergodox’s plentiful keys to get a little more bang for my layer buck than I do on, e.g., the equivalent Gergo keymap.
The EDIT Layer
Okay! This was the layer that started them all! I had been using a Vortex Poker 3 keyboard before the ‘dox and really appreciated the little navigational cluster it puts under the right home keys. So, when I got my new keyboard, obviously that was the first thing I replicated! I’d also put a few AHK scripts together for the Pok3r for things like “move one word ahead” (option-right on Mac, control-right on Windows) and found them super useful for text editing, so I added those in, too, and before long I had the concept of a whole layer dedicated to editing text.
Some of these features bear a bit of explanation. The “Move 1 Word Left” key, as an example (on Mac), sends LALT(KC_LEFT) (that is, option-left arrow) to jump back to the next word boundary, great for rapidly traversing text. The “Select” versions simply add Shift so that text traversed is selected instead. On the right hand, I’ve indicated some selection keys by just adding S() (the qmk shorthand for shift) to several navigation keys in what I think are quite logical locations relative to the non-shifted versions.
Form GET and Form PUT are macros I built for copying whole fields between forms or spreadsheets. Form GET left clicks where your mouse is (to select, e.g., a form field you just hovered), then sends G(KC_A) then G(KC_C), selecting all and copying. Form PUT left clicks where your mouse is, then sends G(KC_A) then G(KC_V), overwriting the contents of that cell/field with the contents of the clipboard.
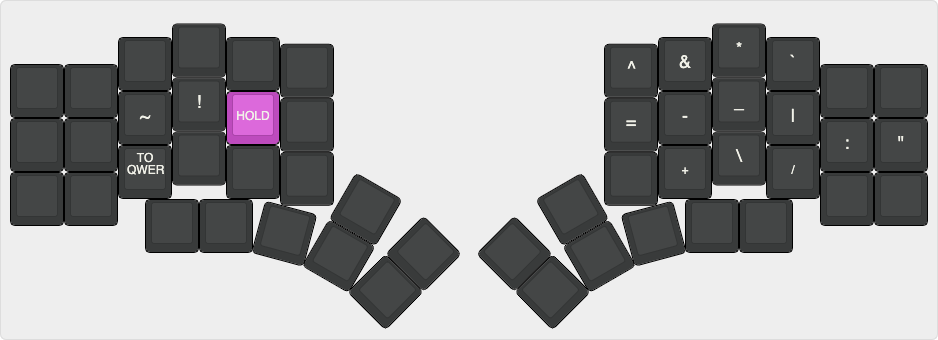
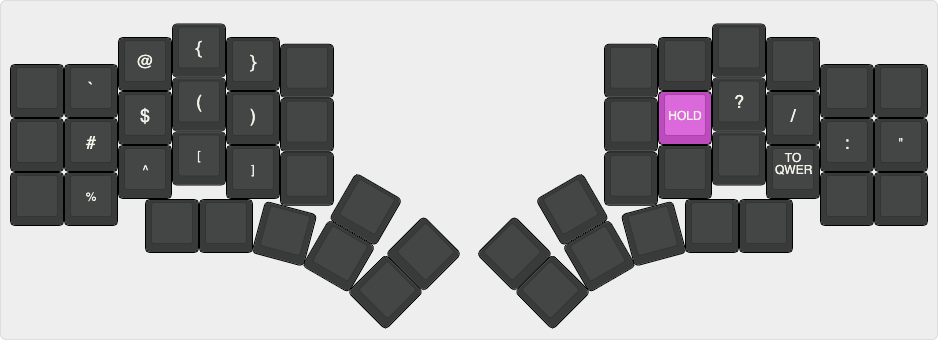
The F and J Alternate Hands Home Row Symbols Layers
These are some of my favorite layers in the layout and I find myself reaching for them constantly, especially anytime I’m coding. Features like the home row punctuation, the parens/braces/brackets, and the equals, dash, underscore group massively reduce the amount of time I bring my hands out of home position.
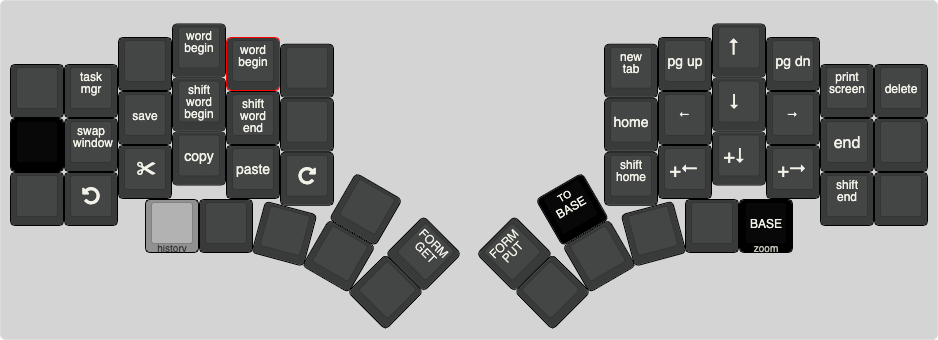
The MEDIA Layer
Here we have some controls for media and some mouse keys that I find occasionally useful for various tasks. This layer is reasonbly self-explanatory.

It’s nice to be able to bring my right hand down one row and have all of my media controls right there.
The ADJUST Layer
This is the least exciting layer and is more for safety than anything else. If I want to hang out in FSYM layer for a while or I somehow get stuck in MEDIA, I’ve always got the option to pop over to ADJUST and bail out to the base layer.

That’s it! That’s the keymap. You can find the source for this keymap in the rmw keymap folder in the qmk repo. The absolute latest version is more likely to be found on my fork, especially in the rmw branch. Lots of my TapDances, custom keycodes, and other assorted Stuff resides in my users folder, as well, so if you don’t recognize something, check there. I’ve linked that folder in my fork and branch, but of course there’s a copy in the main repo, as well.
Also, it may interest you to learn that I have created versions of this keymap for Gergo, Kyria, and Mitosis, as well.